The [Mock bridge contract](https://github.com/rsksmart/rsk-runes/tree/main/contracts) defines a new token type, **RuneToken**, based on the **ERC-1155 standard**. It also uses the **Ownable** contract, which restricts certain functions to the contract's owner.
## **Key Imports:**
```plaintext
import "@openzeppelin/contracts/token/ERC1155/ERC1155.sol";
import "@openzeppelin/contracts/access/Ownable.sol";
import "@openzeppelin/contracts/utils/Strings.sol";
```
* **ERC1155**: This is a token standard that supports both fungible and non-fungible tokens within the same contract.
* **Ownable**: This contract standard restricts certain actions to only the contract's owner (the one who deployed it or someone assigned as the owner).
* **Strings**: A utility library for working with string conversions.
## **Main Components of the Contract**
### **Events:**
* `TokensFrozen`: Emits an event when tokens are frozen for a specific account.
* `TokensUnfrozen`: Emits an event when tokens are unfrozen.
### **Data Structures:**
* **Balance**: Holds the account and balance of a token.
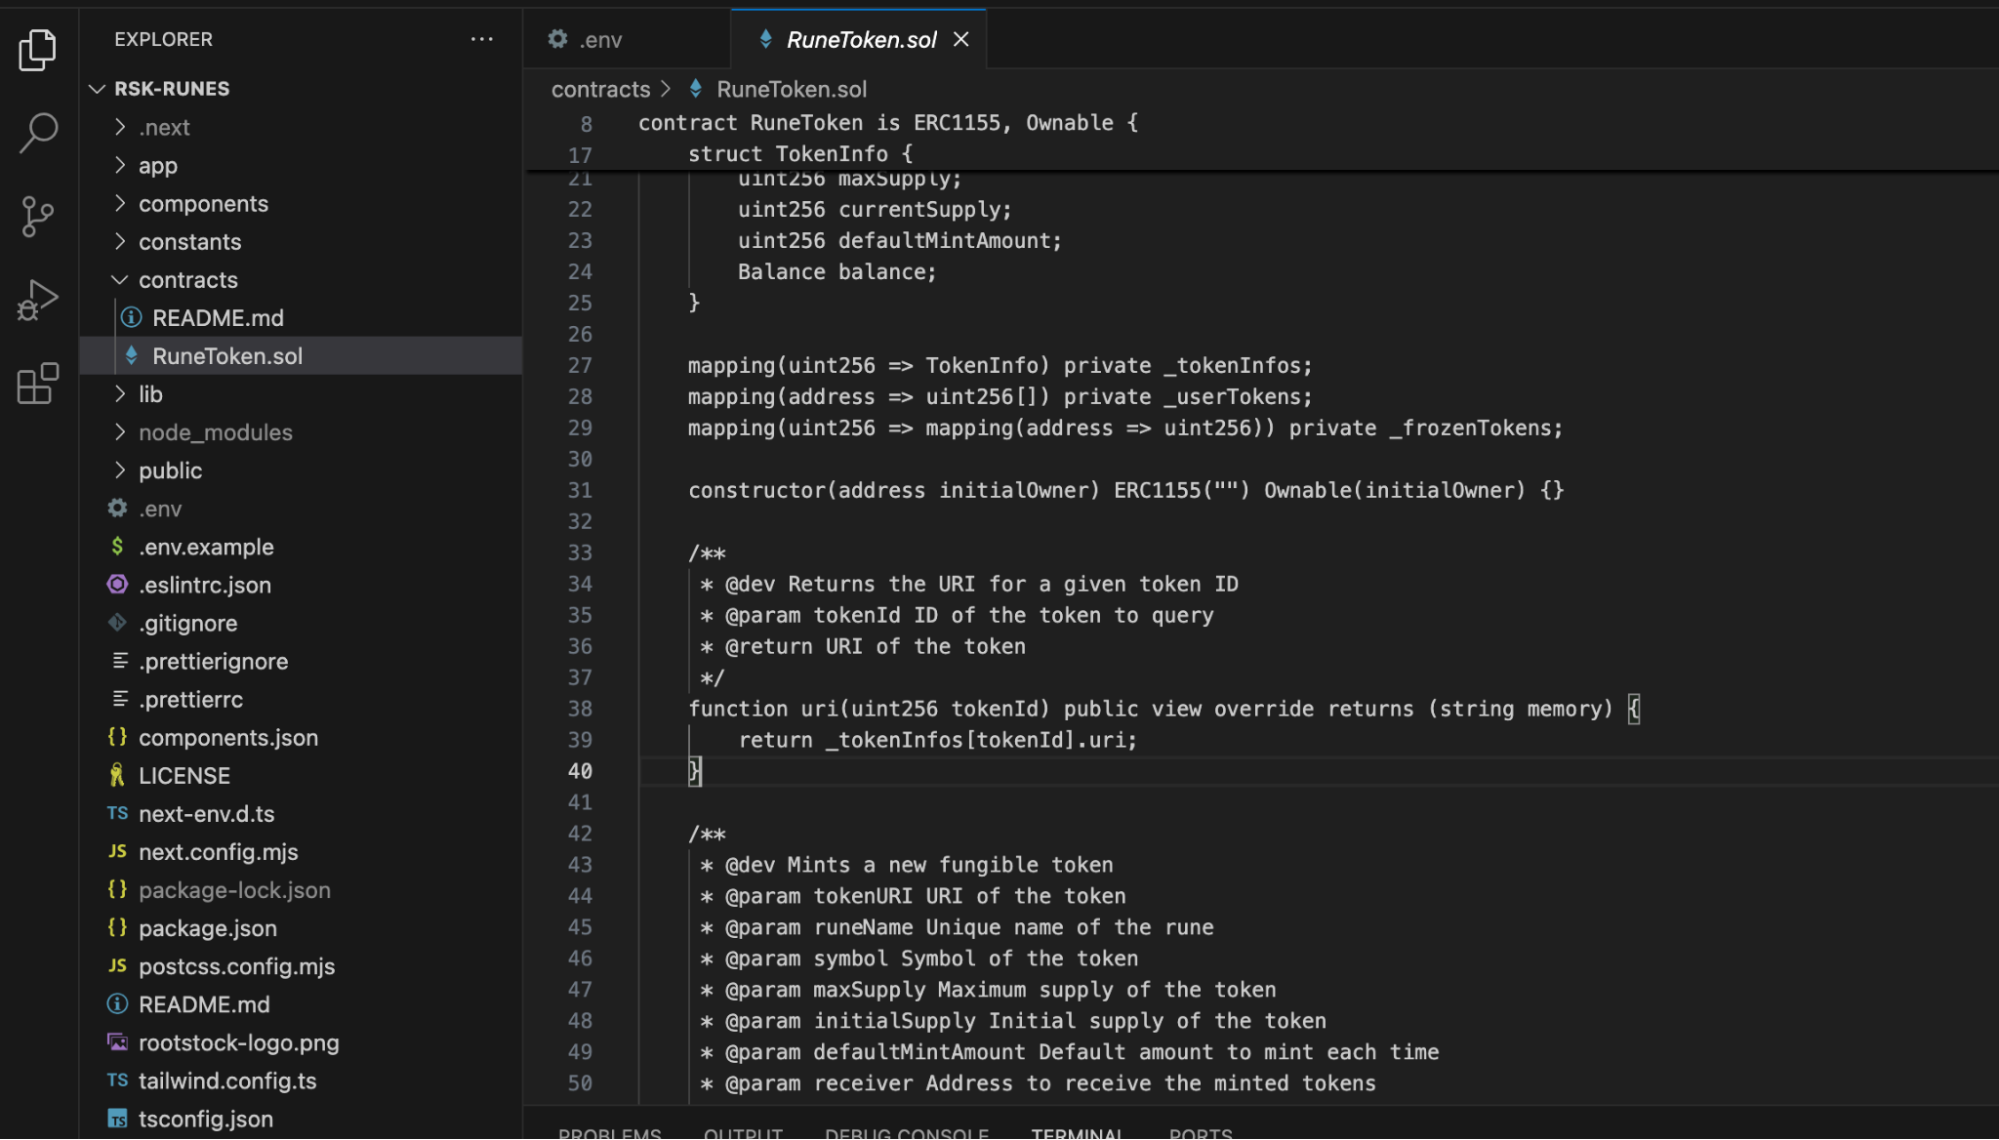
* **TokenInfo**: Contains details about a token, such as its URI ( **Uniform Resource Identifier**), name, symbol, maximum supply, current supply, default minting amount, and balance.
### **Mappings:**
* `_tokenInfos`: Stores the information about each token, keyed by the token ID.
* `_userTokens`: Tracks all tokens held by a user.
* `_frozenTokens`: Keeps track of how many tokens are frozen for each user.
## **2\. The Constructor**
```js
constructor(address initialOwner) ERC1155("") Ownable(initialOwner) {}
```
* **ERC1155 ("")**: This calls the ERC1155 constructor, but the URI is set as an empty string initially.
* **Ownable (initialOwner)**: The `Ownable` contract is initialized with the `initialOwner` as the owner of the contract, allowing only this address to perform certain actions (e.g., minting).
## **3\. The `uri` Function**
```
function uri(uint256 tokenId) public view override returns (string memory) {
return _tokenInfos[tokenId].uri;
}
```
This function returns the URI for a given token ID. The URI typically points to a metadata file that contains additional details about the token (e.g., images, descriptions).
## **4\. Minting Fungible Tokens**
```js
function mintFungible(
string memory tokenURI,
string memory runeName,
string memory symbol,
uint256 maxSupply,
uint256 initialSupply,
uint256 defaultMintAmount,
address receiver
) public onlyOwner {
// Function logic here
}
```
This function allows the owner of the contract to mint fungible tokens.
### **Steps Involved:**
1. **Check max supply**: Ensure that the initial supply is not greater than the maximum allowed supply.
2. **Generate a token ID**: A unique token ID is created by hashing the `runeName` using `keccak256`.
3. **Token ID uniqueness check**: Ensure that the token ID doesn't already exist.
4. **Save Token Info**: Store details about the token in the `_tokenInfos` mapping.
5. **Mint the token**: Mint the specified amount (`initialSupply`) to the `receiver` address.
6. **Track ownership**: Add the minted token to the user's list of owned tokens using `_addUserToken`.
## **5\. Minting Non-Fungible Tokens (NFTs)**
```js
function mintNonFungible(
string memory tokenURI,
string memory runeName,
string memory symbol,
address receiver
) public onlyOwner {
// Function logic here
}
```
This function is similar to `mintFungible` but for minting non-fungible tokens. A non-fungible token is a unique token, meaning only one exists.
### **Key Differences:**
* **Max Supply** is always `1` for non-fungible tokens.
* **Current Supply** is also set to `1`.
## **6\. Minting More Tokens**
```js
function mintMore(
string memory runeName,
address receiver
) external onlyOwner {
// Function logic here
}
```
This function allows the contract owner to mint additional tokens of an existing fungible token, as long as the new supply doesn’t exceed the maximum supply.
### **Key Steps:**
1. **Check token existence**: Ensure the token exists by checking its `maxSupply`.
2. **Check supply limits**: Ensure the current supply plus the new minting amount doesn’t exceed the max supply.
3. **Mint tokens**: Mint more tokens to the `receiver`.
## **7\. Token Freezing and Unfreezing**
### **Freezing Tokens:**
```js
function freezeTokens(string memory runeName, uint256 amount, address owner) external onlyOwner {
// Function logic here
}
```
* Freezing tokens restricts the user from transferring them.
* The function ensures that the account has sufficient tokens to freeze.
* The frozen amount is added to `_frozenTokens`.
### **Unfreezing Tokens:**
```js
function unfreezeTokens(string memory runeName, uint256 amount, address owner) external onlyOwner {
// Function logic here
}
```
* This function unfreezes the tokens, allowing the user to transfer them again.
* The frozen amount is reduced from `_frozenTokens`.
## **8\. Token Information Queries**
### **Get Token Information:**
```js
function getTokenInfo(uint256 tokenId, address holder) public view returns (TokenInfo memory) {
// Function logic here
}
```
* This function retrieves the details about a token (such as URI, name, symbol, max supply, etc.).
* It can also include the token balance of a specific `holder` if the `holder` address is provided.
### **Get Tokens Owned by a User:**
```js
function getUserTokens(address user) public view returns (uint256[] memory) {
return _userTokens[user];
}
```
* This function returns a list of all token IDs owned by a specific user.
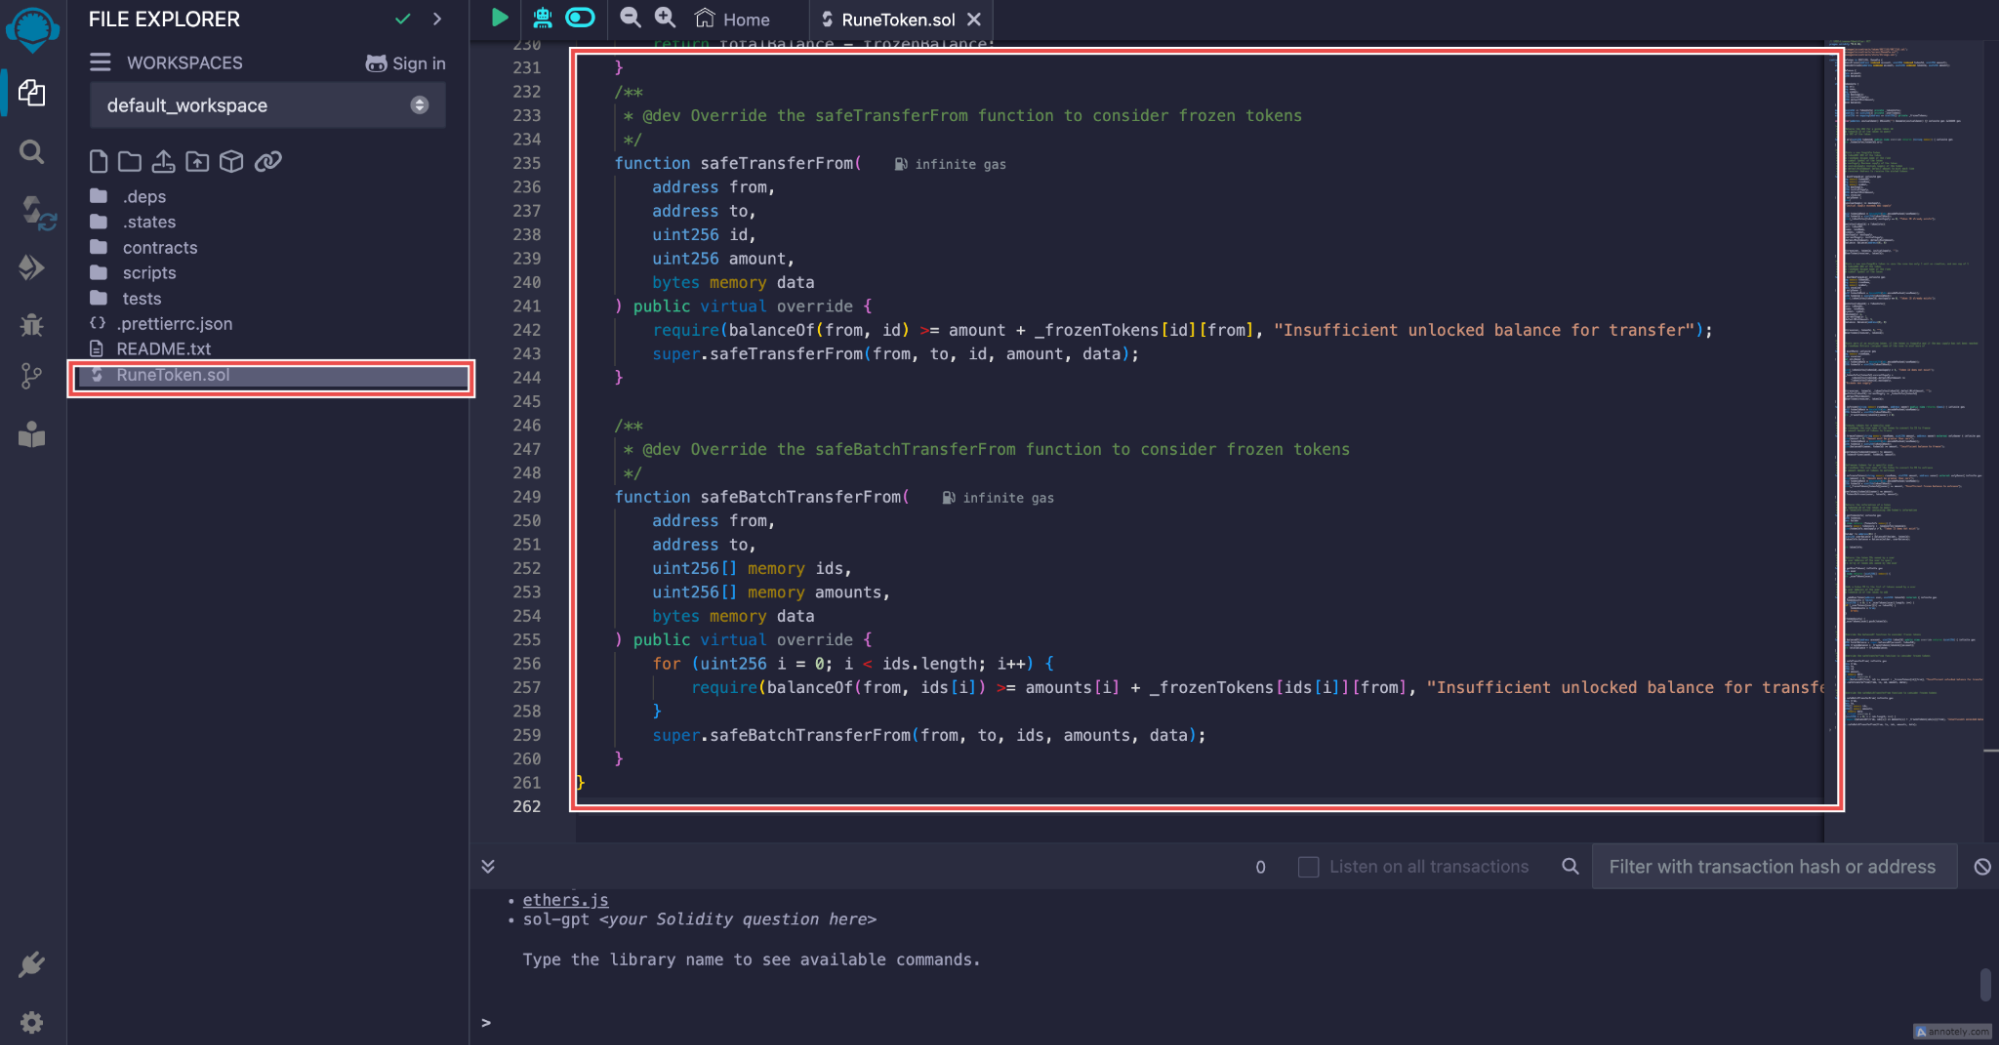
## **9\. Token Transfer Functions with Freezing Consideration**
ERC1155 includes transfer functions (`safeTransferFrom` and `safeBatchTransferFrom`). These are overridden in this contract to take into account frozen tokens.
```js
function safeTransferFrom(
address from,
address to,
uint256 id,
uint256 amount,
bytes memory data
) public virtual override {
require(balanceOf(from, id) >= amount + _frozenTokens[id][from], "Insufficient unlocked balance for transfer");
super.safeTransferFrom(from, to, id, amount, data);
}
```
This ensures that users cannot transfer frozen tokens. The contract checks that the unlocked balance (total balance minus frozen balance) is sufficient before allowing transfers.
## **10\. Overriding `balanceOf` to Consider Frozen Tokens**
```js
function balanceOf(address account, uint256 tokenId) public view override returns (uint256) {
uint256 totalBalance = super.balanceOf(account, tokenId);
uint256 frozenBalance = _frozenTokens[tokenId][account];
return totalBalance - frozenBalance;
}
```
This function returns the number of **unfrozen** tokens owned by a user for a specific token ID.
:::info[Complete Codebase on GitHub]
[**Complete RSK-Runes**](https://github.com/rsksmart/rsk-runes/tree/main/contracts)
:::
## **Smart Contract Deployment**
To deploy the Runes smart contract using Remix IDE, follow these steps in detail:
### **Step 1: Access Remix IDE**
1. Open your web browser and go to [Remix IDE](https://remix.ethereum.org/#lang=en&optimize=false&runs=200&evmVersion=null&version=soljson-v0.8.26+commit.8a97fa7a.js).
### **Step 2: Create a New File**
 1. In the Remix IDE, navigate to the **File Explorer** (the first icon on the left sidebar).
2. Click on the **file** icon to create a new file.
3. Name the file `RuneToken.sol`.
### **Step 3: Copy and Paste the Smart Contract**
1. Locate the `RuneToken.sol` file from the RSK-RUNES repository under the contracts folder
1. In the Remix IDE, navigate to the **File Explorer** (the first icon on the left sidebar).
2. Click on the **file** icon to create a new file.
3. Name the file `RuneToken.sol`.
### **Step 3: Copy and Paste the Smart Contract**
1. Locate the `RuneToken.sol` file from the RSK-RUNES repository under the contracts folder
 2. Open the `RuneToken.sol` file and copy the entire smart contract code.
3. Paste the copied code into the newly created `RuneToken.sol` file in Remix IDE.
2. Open the `RuneToken.sol` file and copy the entire smart contract code.
3. Paste the copied code into the newly created `RuneToken.sol` file in Remix IDE.
 4. Click on the **Save** icon (the disk icon) to save the file.
### **Step 4: Compile the Smart Contract**
4. Click on the **Save** icon (the disk icon) to save the file.
### **Step 4: Compile the Smart Contract**
 1. Go to the **Solidity Compiler** tab (the third icon in the left sidebar).
2. Make sure the compiler version matches `0.8.26`. If not, select the correct version from the dropdown menu.
3. Click on the **Compile RuneToken.sol** button. A green check icon inside a circle will appear, indicating that the compilation was successful.
### **Step 5: Deploy the Smart Contract**
1. Go to the **Solidity Compiler** tab (the third icon in the left sidebar).
2. Make sure the compiler version matches `0.8.26`. If not, select the correct version from the dropdown menu.
3. Click on the **Compile RuneToken.sol** button. A green check icon inside a circle will appear, indicating that the compilation was successful.
### **Step 5: Deploy the Smart Contract**
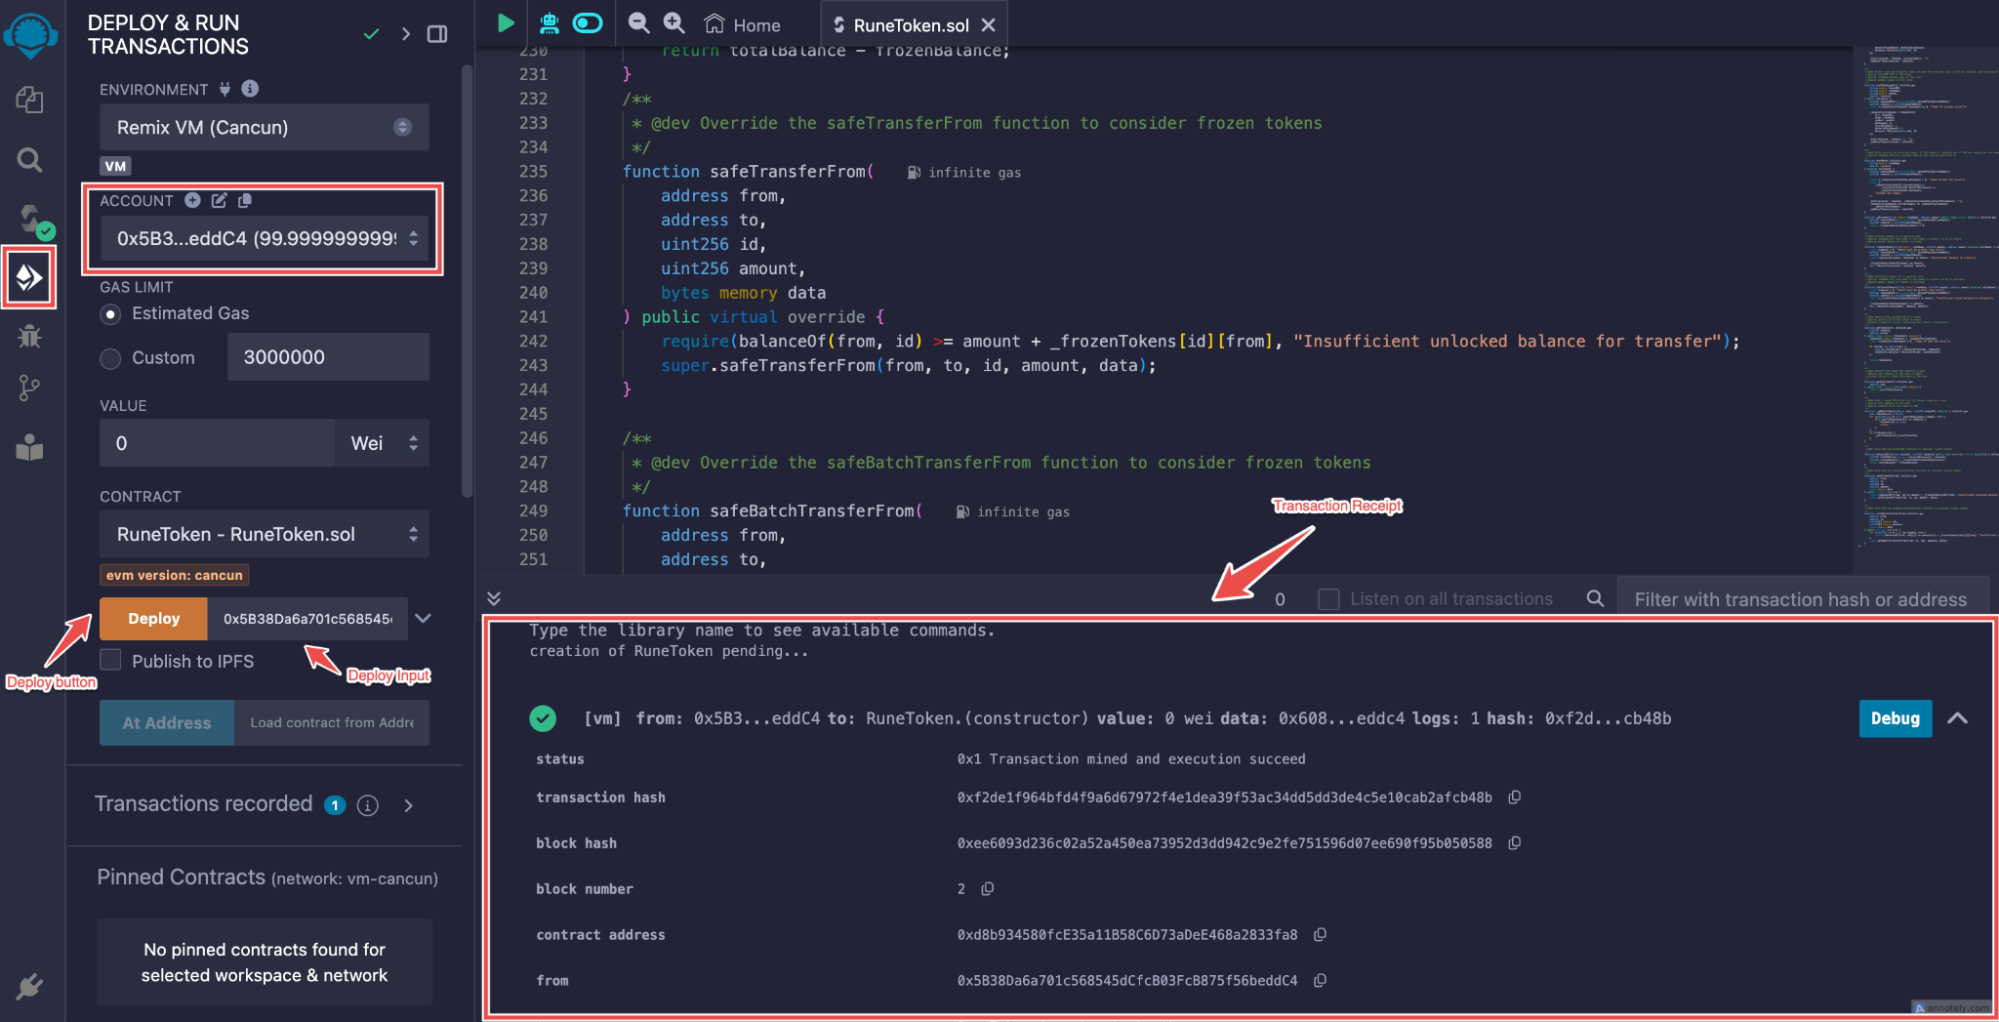 1. Navigate to the **Deploy & Run Transactions** tab (the fourth icon in the left sidebar).
2. Under **Environment**, select **Remix VM**
3. In the **Account** dropdown, copy the first address by clicking the icon next to it.
4. Paste the copied address into the **Deploy** input field.
5. Click the **Deploy** button.
### **Step 6: Copy the Smart Contract Address**
1. Navigate to the **Deploy & Run Transactions** tab (the fourth icon in the left sidebar).
2. Under **Environment**, select **Remix VM**
3. In the **Account** dropdown, copy the first address by clicking the icon next to it.
4. Paste the copied address into the **Deploy** input field.
5. Click the **Deploy** button.
### **Step 6: Copy the Smart Contract Address**
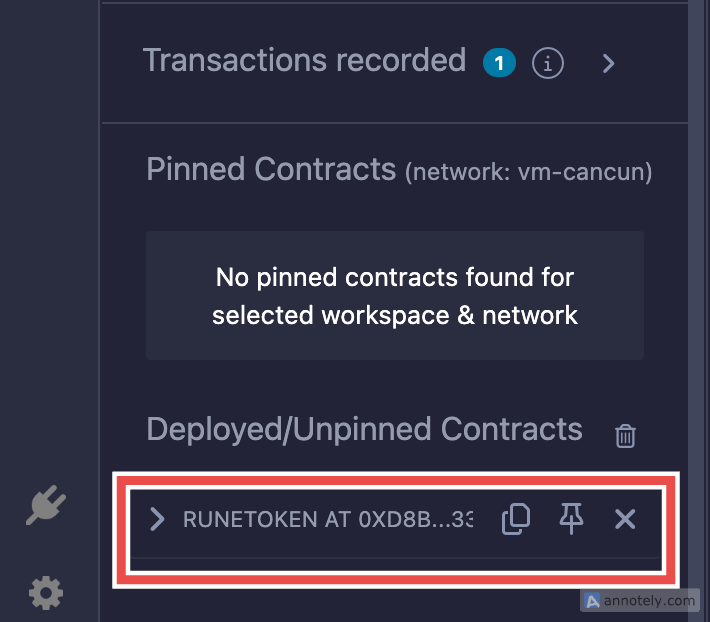 1. After deployment, scroll down to see the **Deployed Contracts** section.
2. You will find the generated smart contract address listed there. Copy this address for your records.
### **Alternative Method to Copy the Contract Address**
1. Alternatively, you can also copy the contract address from the **Transaction Receipt** that appears after deployment.
2. Look for the contract address in the receipt and copy it as well.
1. After deployment, scroll down to see the **Deployed Contracts** section.
2. You will find the generated smart contract address listed there. Copy this address for your records.
### **Alternative Method to Copy the Contract Address**
1. Alternatively, you can also copy the contract address from the **Transaction Receipt** that appears after deployment.
2. Look for the contract address in the receipt and copy it as well.