Imagine being able to ask your app, “What’s my token balance?” or “Send 0.01 tRBTC to this address,” and it just… does it. No forms, no buttons—just a conversation with an AI agent that knows how to talk to the blockchain.
In this guide, we will build a lightweight dApp that connects a conversational AI agent to the Rootstock testnet, allowing users to perform DeFi actions like checking token balances and sending tRBTC simply by chatting. This is not just a chatbot—it is a minimal DeFi agent that can reason over wallet data, maintain conversational context, and issue token actions with a human-like touch.
The tech stack used in this tutorial is:
- [NextJS](https://nextjs.org/) as the development framework.
- The [Rootstock Next Reown starter kit](https://github.com/rsksmart/rsk-reown-next-starter-kit) and Wagmi to handle wallet connections and blockchain interactions.
- [Groq’s](https://groq.com/) LLM API, for the natural language interface.
- [Shadcn](https://ui.shadcn.com/) as UI library.
## What you'll learn
**By the end of this tutorial, you will have**:
- A connected wallet UI running on Rootstock testnet
- A chat interface powered by an LLM (via Groq SDK)
- A fully functioning AI agent that can interpret user intent and call blockchain methods accordingly
Let’s dive into how AI and decentralized infrastructure can come together in a single-page app with real utility.
## Prerequisites
Ensure you have the following installed:
- Node.js (v18+)
- Git
- A browser wallet like MetaMask connected to the Rootstock Testnet
- Some basic familiarity with Javascript/Typescript and smart contract interaction
## Project Setup
Clone the [Rootstock Reown & Next Starter Kit](https://github.com/rsksmart/reown-next-starter-kit). Reown (previously WalletConnect) is a really popular tool in the web3 ecosystem that abstracts the wallet connection and management in decentralized applications (dApps). This starter kit comes already configured with [Wagmi](https://wagmi.sh/), [Shadcn](https://ui.shadcn.com/) and Rootstock networks - testnet and mainnet.
Clone the project:
```shell
git clone https://github.com/rsksmart/reown-next-starter-kit.git
cd reown-next-starter-kit
```
Proceed to install dependencies:
```shell
npm install
# or
bun install
```
:::info[Want to dive right in?]
Find the full source code in the
🔗 [AI Agents Rootstock GitHub repo](https://github.com/rsksmart/ai-agent-rsk)
Feel free to clone it, fork it, and build further on it.
:::
## Set up Environment Variables
Create a `.env.local` file and set your environment variables based on the `.env.example` file. You will find four of them:
- `NEXT_PUBLIC_PROJECT_ID` from Reown. Get it on [Reown Cloud](https://cloud.reown.com/).
- `NEXT_PUBLIC_RPC_MAINNET` is the mainnet RPC URL. Get it on the [RPC API service](https://rpc.rootstock.io/).
- `NEXT_PUBLIC_RPC_TESTNET` is the testnet RPC URL, also available at RPC API service.
- `GROQ_API_KEY` that you can get at [Groq’s website](https://console.groq.com/keys) for free.
When the `.env.local` file is ready then you can test if everything is on point by running the project.
```shell
npm run dev
# or
bun dev
```
If there is no error and the app is running correctly on the server, we are ready to start the project.
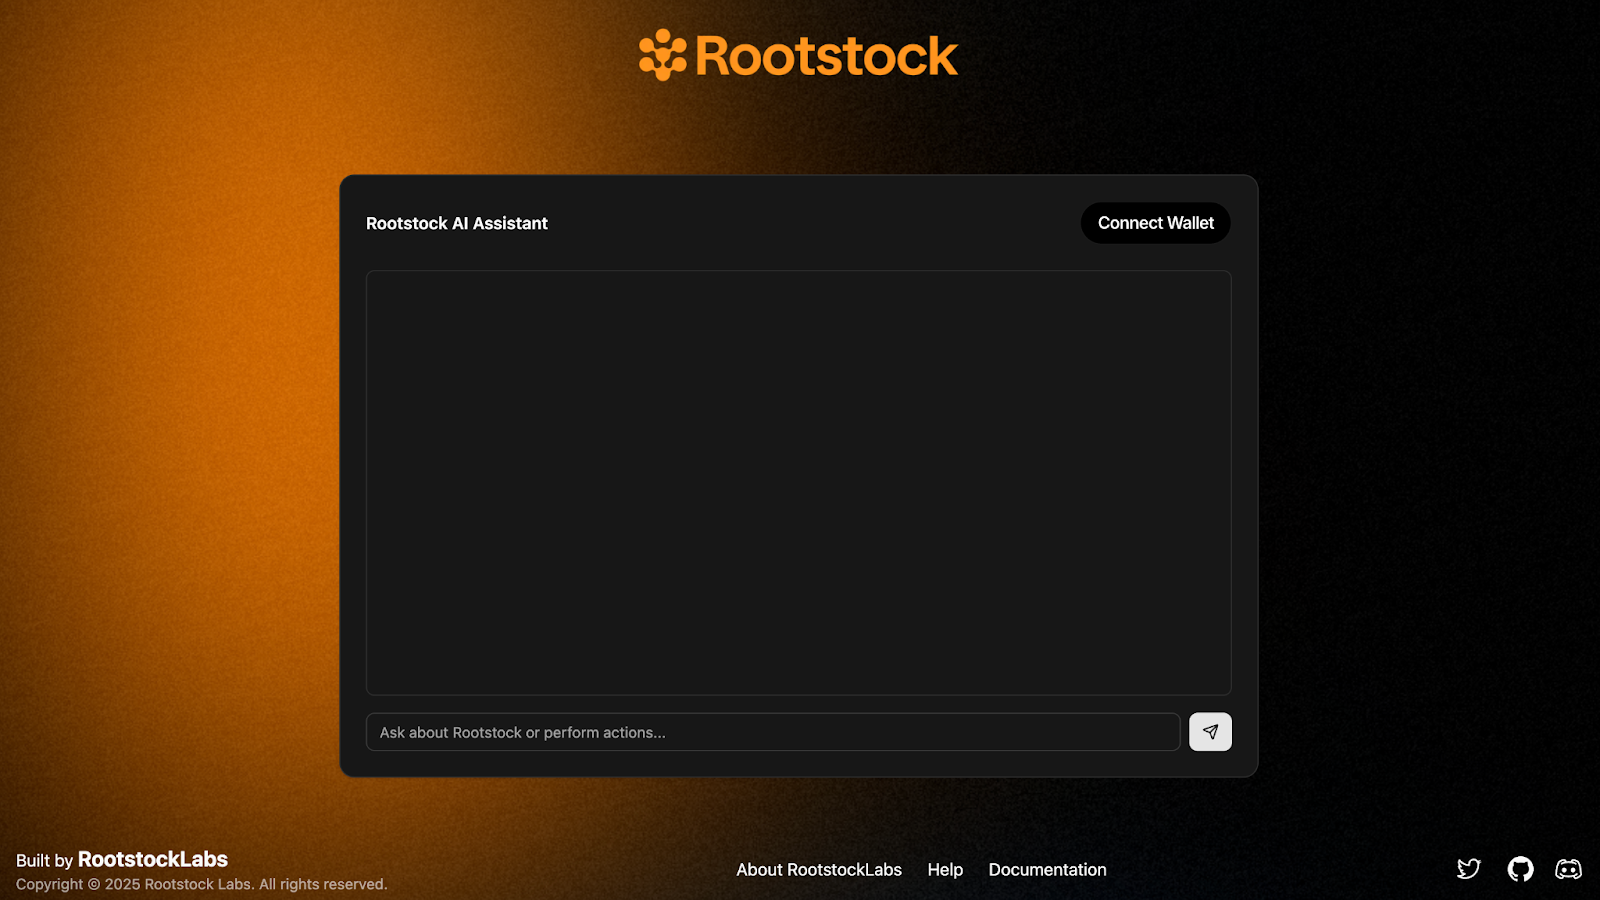
## Define the AI Agent UI
To set up the AI agent's user interface, we'll focus solely on the visual layer. Since Shadcn is already configured, there's no need to go in-depth here—simply update the `page.tsx` file with the following code:
```js
export default function Home() {
return (
);
}
```
:::danger[Module not found: Can't resolve '@/components/ui/input']
> If you get the error: Module not found: Can't resolve '@/components/ui/input'
For NPM:
```shell
npx shadcn@latest add input
```
If using BUN:
```shell
bunx --bun shadcn@latest add input
```
:::
Verify that the development server is running:
## Handling Logic
In this section, we will create the logic for managing messages, and enable dynamic interaction between the user and the AI agent, this means handling messages from the user, triggering an AI response, and rendering the chat conversation in real-time.
### Message Management
We will create the logic to manage messages. Start by creating a pair of useState to store all of the messages from the chat in the `page.tsx` file:
```js
const [messages, setMessages] = useState<{ role: string; content: React.ReactNode }[]>([
{
role: "agent",
content: "Hello! I can help you interact with the Rootstock testnet. What would you like to do?",
},
])
```
> Note that we are storing in the useState an array of objects and each of these objects contain two attributes: `role` and `content`. The role defines whether the message is from the agent or from the user and the content is the message sent by any of the two roles.
Create a `useState` for storing the input value:
```js
const [input, setInput] = useState("")
```
Next, we are going to create a function called `handleSend` that will manage the messages in the chat. The functions looks something like this:
```js
const handleSend = async () => {
if (!input.trim()) return
const userMessage = input
setInput("")
// Messsage from bot telling user is processing the request
const processingMessage = {
role: "bot" as const,
content: "Processing your request...",
};
const newMessages = [...messages, userMessage, processingMessage];
// Add user message to chat
setMessages(newMessages);
try {
// Process the message with AI and give an answer
} catch (error) {
// Handle error in request
setMessages([
...newMessages.slice(0, -1),
{
role: "bot",
content: `Error: ${
error instanceof Error ? error.message : "Operation failed"
}`,
},
]);
}
}
```
Update the html with these functions and the whole component should look like this:
```js
export default function Home() {
const [messages, setMessages] = useState<{ role: string; content: string }[]>([
{
role: "agent",
content: "Hello! I can help you interact with the Rootstock testnet. What would you like to do?",
},
])
const [input, setInput] = useState("")
const handleSend = async () => {
if (!input.trim()) return
const userMessage = input
setInput("")
// Messsage from bot telling user is processing the request
const processingMessage = {
role: "bot" as const,
content: "Processing your request...",
};
const newMessages = [...messages, userMessage, processingMessage];
// Add user message to chat
setMessages(newMessages);
try {
// Process the message with AI and give an answer
} catch (error) {
// Handle error in request
setMessages([
...newMessages.slice(0, -1),
{
role: "bot",
content: `Error: ${
error instanceof Error ? error.message : "Operation failed"
}`,
},
]);
}
}
return (
);
}
```
### Endpoint calling Groq API
Once this is working, you now have a basic chat interface where users can type messages and eventually receive AI-powered responses. This is the core layout that we’ll be building the rest of the experience on top of.
The chat starts with a welcome message; new messages are added as the conversation progresses. User messages are pushed to the chat, and the Groq API generates a response. Blockchain actions like checking balances and sending testnet tokens will be integrated, all through natural language.
The next step is enabling dynamic interaction between the user and the AI agent. This means handling messages from the user, triggering an AI response, and rendering the chat conversation in real-time. To enable our AI agent to understand user intent and respond intelligently (even triggering blockchain actions), we need to create a backend API route. This route will act as the brain of our app, powered by Groq, which will generate answers based on user questions and wallet data.
1. Create a new file called `app/api/ai/route.ts`. This will be our AI handler endpoint that receives messages, builds a context-aware prompt, and sends it to Groq's API.
```js
const groqClient = new Groq({
apiKey: process.env.GROQ_API_KEY as string,
});
```
2. Handling the incoming POST request
```
export async function POST(req: Request) {
try {
const {
type,
data,
question,
address,
messageHistory = [],
} = await req.json();
```
This is the main function that will be triggered when the frontend sends a message. It expects a JSON payload with:
- `type`: The type of action (e.g., chat, balance, transfer)
- `data`: The wallet data or portfolio info
- `question`: What the user asked
- `address`: The user's wallet address
- `messageHistory`: Previous messages from the conversation (optional, but used for context)
3. Build the user prompt
```js
const prompt = createChatPrompt(data, question, address);
```
We call a helper function to construct a structured prompt that includes the user’s wallet data, their question, and some formatting instructions:
```js
function createChatPrompt(userContext: any, question: string, address: string) {...}
```
This combines the user’s question and wallet data into a structured, clear prompt for the LLM. It also reminds the model that we’re using **testnet tokens only**, and it should convert token values from `wei`.
4. Construct the full message history:
```js
const limitedHistory = messageHistory.slice(-10);
const messages = [
{
role: "system",
content: getSystemPrompt(),
},
];
```
The `getSystemPrompt` function defines how the agent should behave — friendly, brief, and focused on Rootstock testnet. It gives the LLM structure so that it can consistently produce helpful and well-formatted answers.
```js
function getSystemPrompt() {...}
```
We take the last 10 messages from the conversation (for context) and add a **system prompt** — this tells the model who it is (a Rootstock agent) and how it should behave.
```js
if (limitedHistory && limitedHistory.length > 0) {
limitedHistory.forEach((msg) => {
messages.push({
role: msg.role === "bot" ? "assistant" : "user",
content: typeof msg.content === "string" ? msg.content : "User input",
});
});
}
messages.push({
role: "user",
content: prompt,
});
```
5. Send the request to Groq
```js
const response = await groqClient.chat.completions.create({
model: "llama3-70b-8192",
max_tokens: 2024,
messages: messages as any,
temperature: 0.7,
tools: [
{
type: "function",
function: {
name: "transfer",
description:
"Transfer tokens from the user's wallet to another address",
parameters: {
type: "object",
properties: {
address: {
type: "string",
description: "Recipient wallet address",
},
token1: {
type: "string",
description:
"Token symbol to transfer (e.g., TRBTC, DOC, RIF)",
},
amount: {
type: "number",
description: "Amount of tokens to transfer",
},
},
required: ["address", "token1", "amount"],
},
},
},
{
type: "function",
function: {
name: "balance",
description: "Check token balance for an address",
parameters: {
type: "object",
properties: {
address: {
type: "string",
description:
"Wallet address to check (defaults to user's wallet if empty)",
},
token1: {
type: "string",
description:
"Token symbol to check balance for (e.g., TRBTC, DOC, RIF)",
},
},
required: ["token1"],
},
},
},
],
tool_choice: "auto",
});
```
Here we call Groq’s chat API with the message history and tool definitions. These tools represent on-chain actions Groq can “call” — like sending tokens or checking balances. When Groq detects that a function is needed, it will return a function call instead of a plain text answer.
6. Handle function calls (if any)
```js
const aiMessage = response.choices[0].message;
const toolCalls = aiMessage.tool_calls;
if (toolCalls && toolCalls.length > 0) {
const toolCall = toolCalls[0];
const functionName = toolCall.function.name;
const functionArgs = JSON.parse(toolCall.function.arguments);
return NextResponse.json({
analysis: aiMessage.content || "Processing your request...",
type,
functionCall: {
name: functionName,
arguments: functionArgs,
},
});
}
```
If the AI response includes a tool call, we extract the name and arguments and return it to the frontend so it can actually perform the blockchain action.
7. Handle regular responses if there’s no function calls:
```js
return NextResponse.json({
analysis: aiMessage.content,
type,
});
```
And also add error handling:
```js
} catch (error) {
console.error("AI Analysis Error:", error);
return NextResponse.json({ error: "Analysis failed" }, { status: 500 });
}
```
With this route in place, our AI agent now has the ability to:
- Understand the user's question in context
- Know the user’s wallet data and portfolio
- Respond conversationally
- Decide when to suggest or trigger a function like balance or transfer
Now we are ready to integrate the frontend.
### Integrate endpoint with UI
Previously, we had a `Home` component that could:
- Send user messages
- Show a "Processing..." bot message
- Display AI responses (placeholder)
Now, we’re turning that into a smart chat assistant that can:
- Interpret user input via a Groq-powered API
- Understand commands like "Send 0.1 tRBTC to 0x..." or "What's my token balance?
- Use the connected wallet (via Reown AppKit) to **read balances** and **send tokens**.
We'll go from a simple message handler to a fully interactive Rootstock AI agent with wallet connection, token transfers, and balance checks.
1. Import the necessary hooks and tools from Reown AppKit and Wagmi.
```js
```
Then add this inside the component:
```js
const { address, isConnected } = useAppKitAccount();
const config = useConfig();
```
Also add a `useState` for managing the loading state:
```js
const [isLoading, setIsLoading] = useState(false);
```
2. Add Token Transfer and Balance Handling Functions
**Token transfer**
```js
const handleTransfer = async (data: { token1: string; address: string; amount: number }) => {
const tokenAddress = data.token1.toLowerCase() === "trbtc"
? "trbtc"
: await findToken(data.token1);
if (!tokenAddress) throw new Error("Token not found");
if (tokenAddress === "trbtc") {
return await sendTransaction(config, {
to: data.address as `0x${string}`,
value: parseEther(data.amount.toString()),
});
} else {
return await writeContract(config, {
abi: erc20Abi,
address: tokenAddress as `0x${string}`,
functionName: "transfer",
args: [data.address as `0x${string}`, BigInt(data.amount)],
});
}
};
```
**Token balance**
```js
const handleBalance = async (data: any) => {
const tokenAdd = data.token1.toLowerCase() === "trbtc"
? "trbtc"
: await findToken(data.token1);
const acc = isAddress(data.address) ? data.address : address;
if (tokenAdd === "trbtc") {
const res = await getBalance(config, { address: acc });
return { displayValue: Number(res.value) / 10e18, symbol: "tRBTC" };
} else {
const res = await readContract(config, {
abi: erc20Abi,
address: checksumAddress(tokenAdd as `0x${string}`),
functionName: "balanceOf",
args: [acc],
});
return { displayValue: Number(res) / 10e18, symbol: data.token1 };
}
};
```
3. Refactor handleSend to Process AI Function Calls
Enhance the `handleSend` function so it calls to the `/api/ai` endpoint and handles any functionCall responses.
Here’s the full updated logic:
```js
const handleSend = async () => {
if (!input.trim()) return;
const userMessage = { role: "user", content: input };
setInput("");
setIsLoading(true);
const processingMessage = { role: "bot", content: "Processing your request..." };
const newMessages = [...messages, userMessage, processingMessage];
if (!isConnected) {
setMessages([
...newMessages.slice(0, -1),
{ role: "bot", content: "Please connect your wallet to perform this action." },
]);
setIsLoading(false);
return;
}
setMessages(newMessages);
try {
const messageHistory = messages.map((msg) => ({
role: msg.role,
content: typeof msg.content === "string" ? msg.content : "Content not available as string",
}));
const response = await fetch("/api/ai", {
method: "POST",
headers: { "Content-Type": "application/json" },
body: JSON.stringify({ type: "chat", question: input, address, messageHistory }),
});
const data = await response.json();
if (data?.functionCall) {
const { name, arguments: args } = data.functionCall;
switch (name) {
case "transfer":
const tx = await handleTransfer(args);
setMessages([
...newMessages.slice(0, -1),
{
role: "bot",
content: (
Transaction: {tx.slice(0, 6)}...{tx.slice(-4)}
),
},
]);
break;
case "balance":
const balance = await handleBalance(args);
setMessages([
...newMessages.slice(0, -1),
{ role: "bot", content: Balance: {balance.displayValue} {balance.symbol}
},
]);
break;
default:
setMessages([
...newMessages.slice(0, -1),
{
role: "bot",
content: (
),
},
]);
}
} else {
setMessages([
...newMessages.slice(0, -1),
{
role: "bot",
content: (
),
},
]);
}
} catch (error) {
setMessages([
...newMessages.slice(0, -1),
{
role: "bot",
content: `Error: ${error instanceof Error ? error.message : "Operation failed"}`,
},
]);
} finally {
setIsLoading(false);
}
};
```
4. Add Autoscroll to the Message View
```js
const containerRef = useRef
) : (
)}
Create a `src/lib/utils.ts` file and include this `isValidWalletAddress` and `findToken` functions:
```js
export function isValidWalletAddress(address: string): boolean {
const regex = /^(0x)?[0-9a-fA-F]{40}$/;
return regex.test(address);
}
export async function findToken(query: string): Promise {
try {
const tokenLowerCase = query.toLowerCase();
// Make API call to Blockscout
const response = await fetch(
`https://rootstock-testnet.blockscout.com/api/v2/tokens?q=${tokenLowerCase}&type=ERC-20`
);
if (!response.ok) {
throw new Error(`API call failed with status: ${response.status}`);
}
const data = await response.json();
// Check if we have any results
if (data.items && data.items.length > 0) {
// Return the address of the first token found
return data.items[0].address;
}
// Return null if no tokens found
return null;
} catch (error) {
console.error("Error fetching token:", error);
return null;
}
}
```
7. Create a `src/lib/constants.ts` and include the `BLOCK_EXPLORER_URL` constant:
```text
export const BLOCK_EXPLORER_URL = "https://explorer.testnet.rootstock.io/tx/";
```
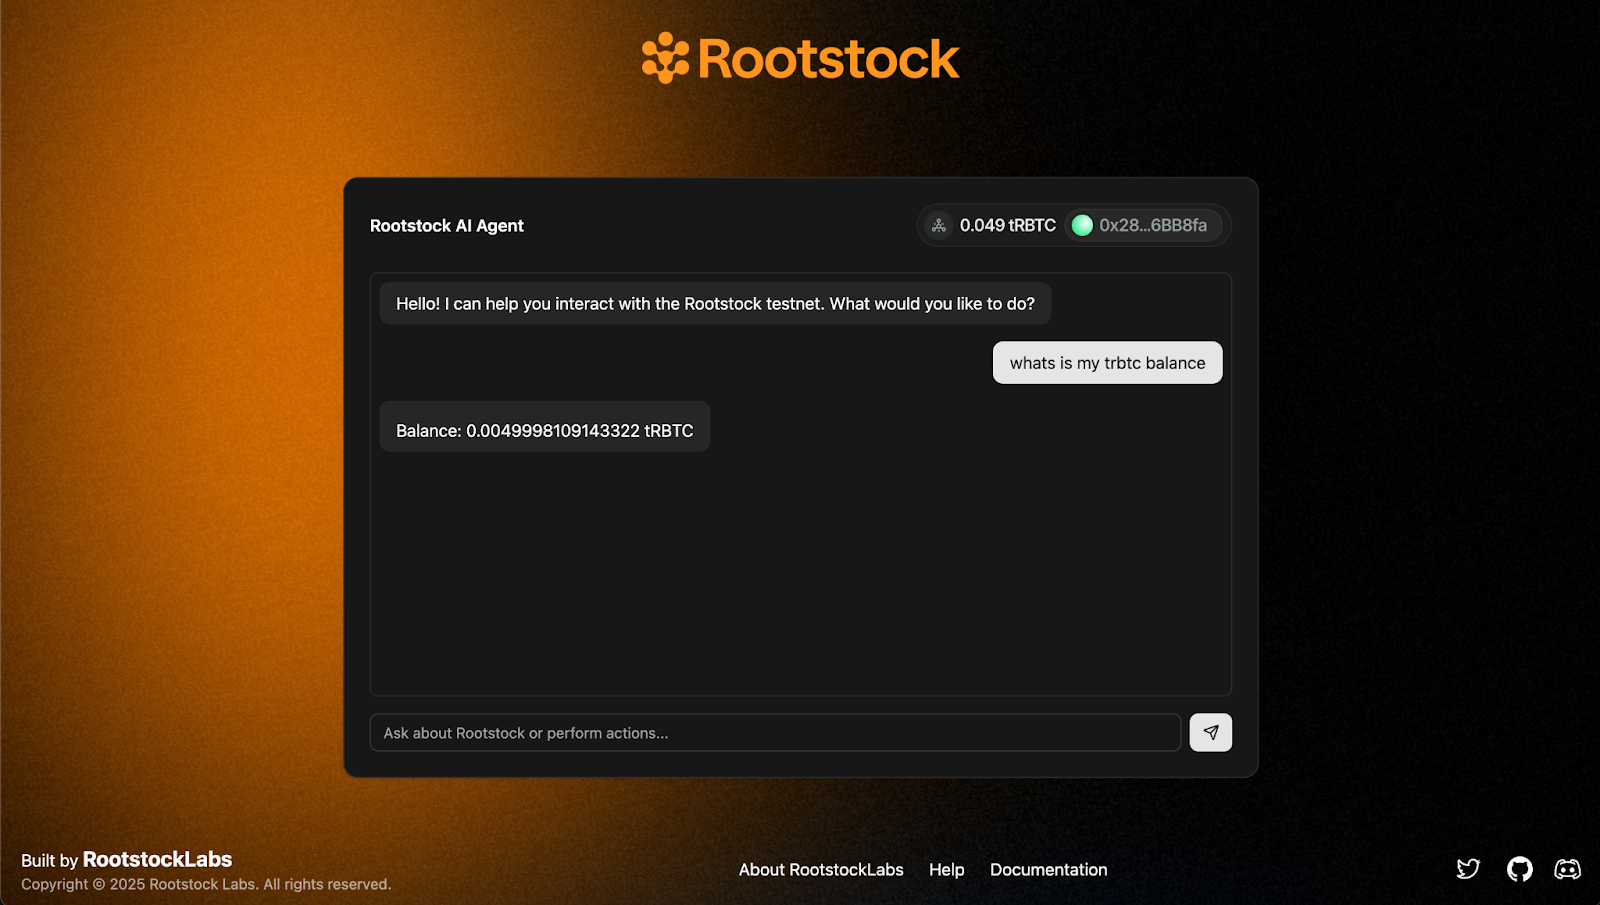
### Interact with the App
1. Query tRBTC balance
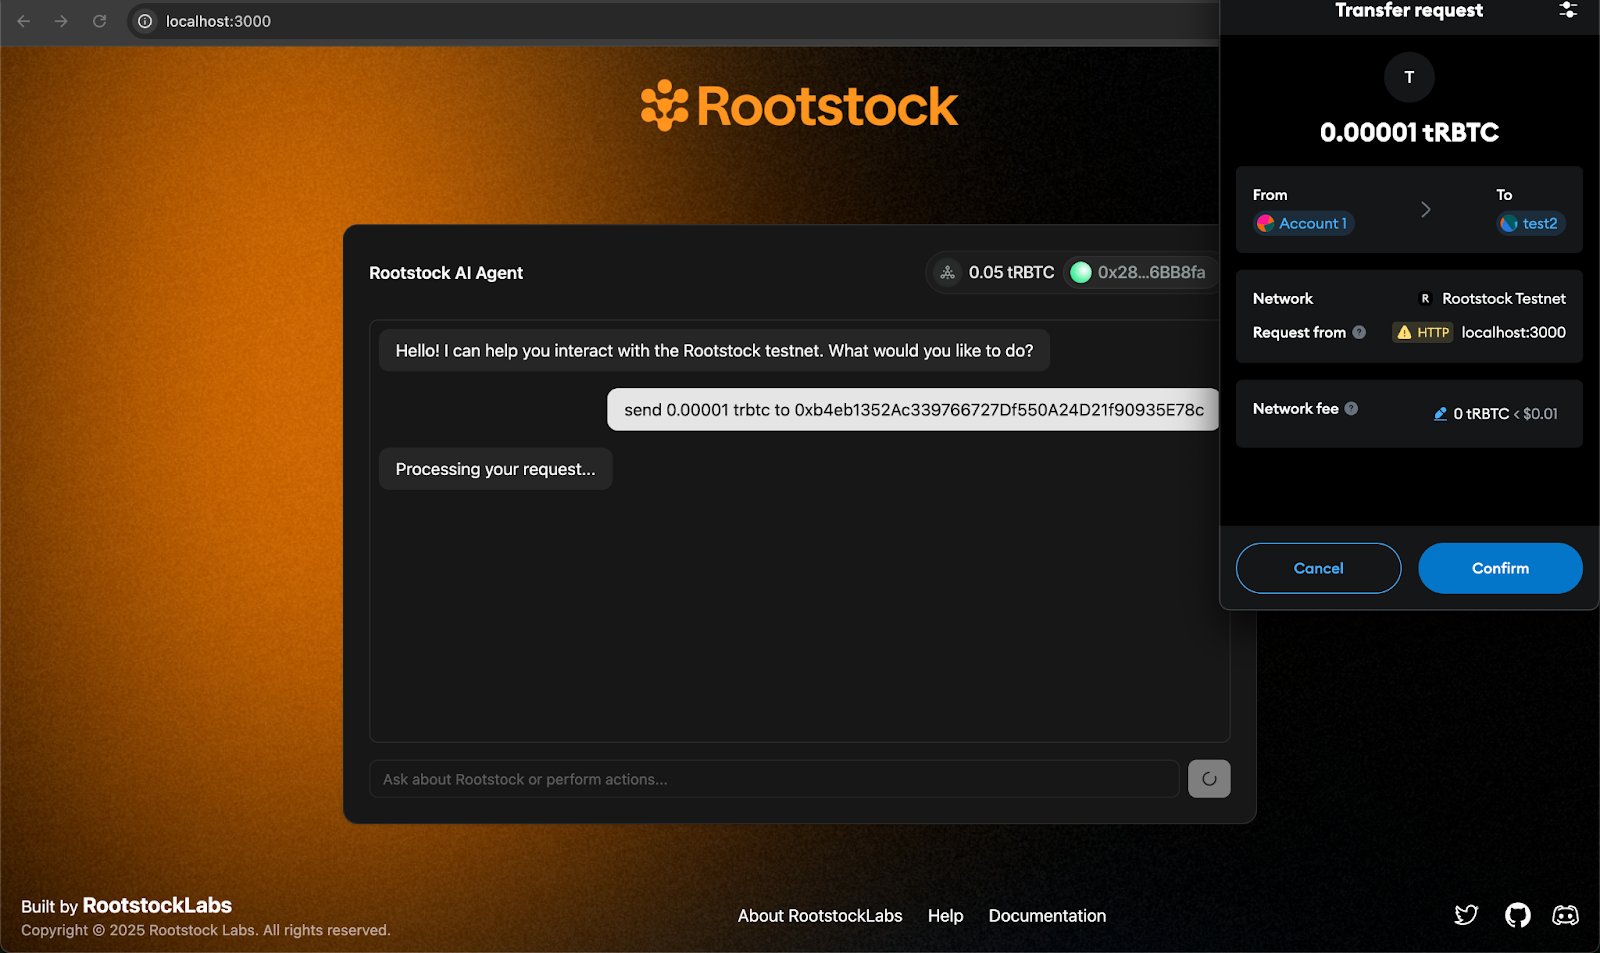
2. Send a transaction
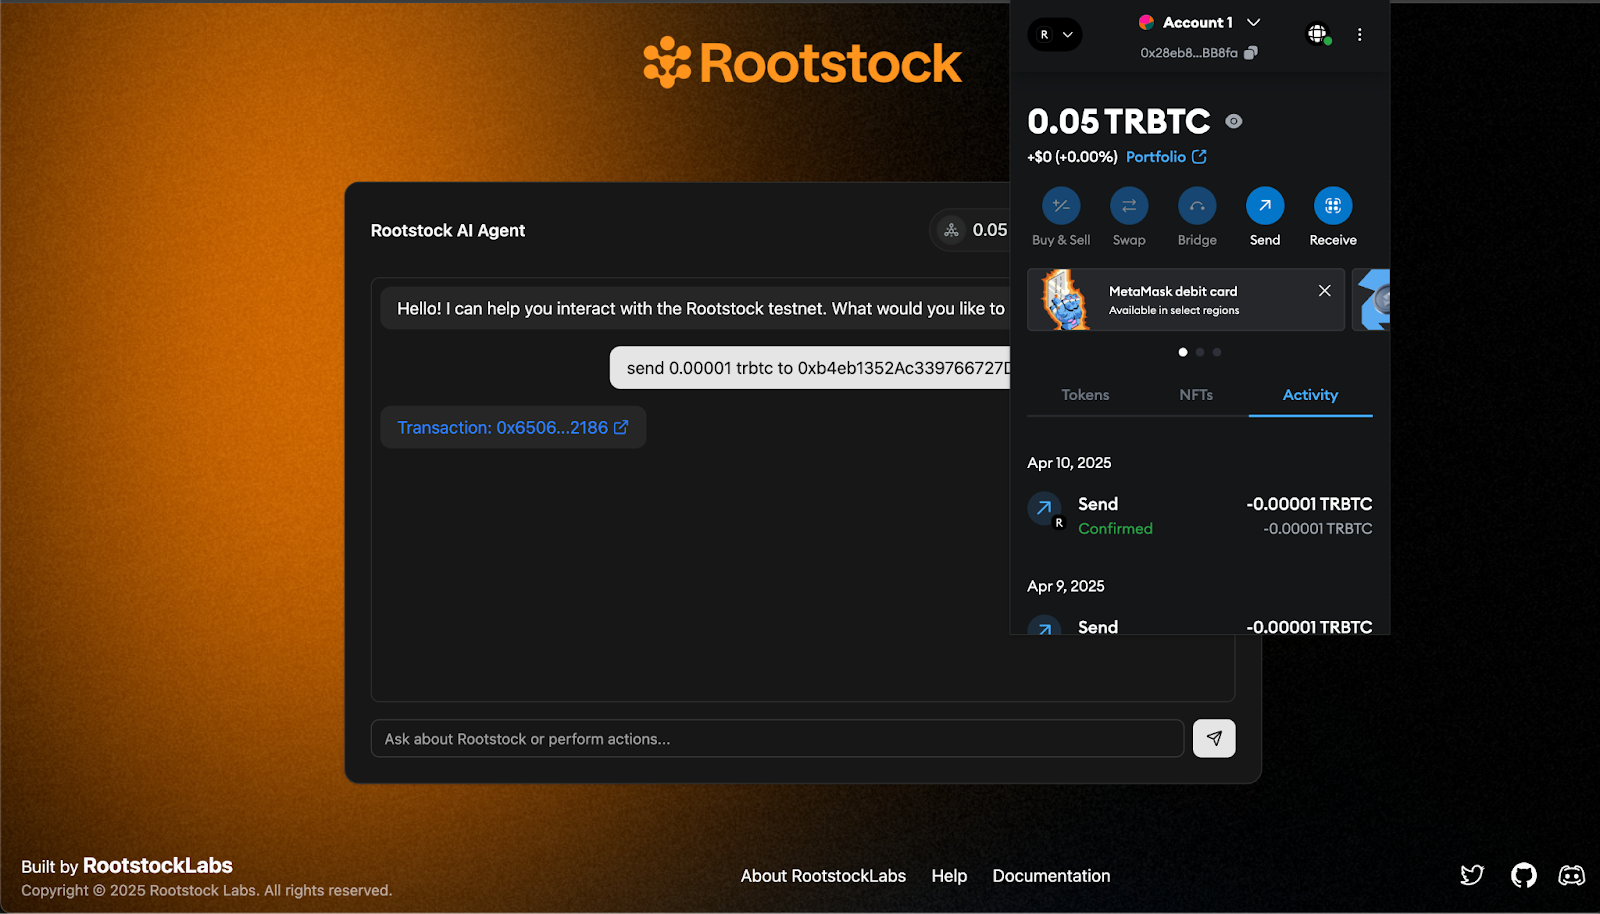
3. Transaction confirmation
:::success[Wrapping up]
And that’s it! You’ve just built a conversational AI agent on Rootstock that understands natural language and interacts directly with the blockchain. From querying token balances to executing tRBTC transfers, everything now happens inside a single chat interface—no buttons, no forms, just fluid DeFi actions through words.
✨ This tutorial was inspired by [BitMate](https://github.com/Zero-Labs-Workspace/BitMate), a project originally built for a Web3 hackathon exploring how AI and decentralized infrastructure can work hand in hand.
You can find the full source code of this tutorial in the
🔗 [AI Agents Rootstock GitHub repo](https://github.com/rsksmart/ai-agent-rsk)
Feel free to clone it, fork it, and build further on it.
:::